Showing posts with label head. Show all posts
Showing posts with label head. Show all posts
Thursday, March 9, 2017
head cleaning epson R230x
head cleaning epson R230x
1. Turn on the Epson Stylus Photo R230 printer or yours R230x
2. Click Start> Control Panel> select Printers and Faxes> Epson R230
3. Click Select Printer Printing Task prefference on the box that is on the right side of the window or can
also right-click on the Epson R230 and select Printing Prefferences
4. Select the Maintenance tab dialog box appears so that these
 5.Then select Head Cleaning as shown in the picture above that I put a red circle, it will
display a dialog box like this
 Select the start like in the picture above that I marked in red arrows, then this machine will do the print head cleaning, ink pumping Please wait for the printer to finish.
2. Click Start> Control Panel> select Printers and Faxes> Epson R230
3. Click Select Printer Printing Task prefference on the box that is on the right side of the window or can
also right-click on the Epson R230 and select Printing Prefferences
4. Select the Maintenance tab dialog box appears so that these
display a dialog box like this
Available link for download

Tuesday, February 14, 2017
Epson Stylus Color 800 Clogged Print Head
Epson Stylus Color 800 Clogged Print Head
Problem :
Dryed black ink clog-up in the tube leading from the black ink cartridge to the print head. Black ink flow totally halted. New cartridges wont work.
Background :
Epson uses very fast-drying, water-soluble, inks in this printer, and if the printer sits idle for some length of time the ink feed tubes and the print heads become clogged with dry ink. Epson issues dire warnings about potential damage to the printer if attempts are made to flush these parts with any solvent, and recommends factory repair only.
On the advice of someone who has vast experience with such problems, I successfully used the following repair procedure.
Repair Procedure :
Use this procedure at your own risk. All I can tell you is that it worked beautifully for me. There was NO printer damage.
Dryed black ink clog-up in the tube leading from the black ink cartridge to the print head. Black ink flow totally halted. New cartridges wont work.
Background :
Epson uses very fast-drying, water-soluble, inks in this printer, and if the printer sits idle for some length of time the ink feed tubes and the print heads become clogged with dry ink. Epson issues dire warnings about potential damage to the printer if attempts are made to flush these parts with any solvent, and recommends factory repair only.
On the advice of someone who has vast experience with such problems, I successfully used the following repair procedure.
Repair Procedure :
- Use a clean small hypodermic syringe with NO needle. Press on to the syringe nozzle, a 3/4 inch long piece of model airplane gas engine fuel tubing. This tubing is available cheaply from your local model hobby shop. It is a pale light blue colored plastic tubing. The MEDIUM size is the right one. The bore (ID) of the tubing is less than 1/16 of an inch. It makes a very tight fit when pushed onto the syringe nozzle.
- Remove the cartridge from the printer, and pull the power plug immediately to prevent any further printer movement.
- Load the syringe with 2-3 CCs of scalding hot water, preferably distilled water available at your grocery store. Then press the other end of the tubing down over the little black nozzle in the bottom of the cartridge holder. It must be a very tight fit.
- Forcibly inject the hot water into the printer. If the clogging is really severe, you may have to press the syringe plunger very hard. Continue injecting until the syringe is empty, while making sure that the tubing does not slip off the syringe or the printer nozzle. Repeat this injection procedure 1-2 more times with more hot water if necessary.
- Once the hot water goes through easily, the clog has been dissolved. It may be necessary to wait 24 hours for the water to evaporate, but in my case it was not. I simply replaced the black ink cartridge, and ran the Epsons head-cleaning utility several times until the black ink started coming through. Running the nozzle-check utility, to make a test pattern print, will let you know when the ink flow is OK.
Use this procedure at your own risk. All I can tell you is that it worked beautifully for me. There was NO printer damage.
Available link for download
Monday, January 30, 2017
How to Replace Head Printer Epson
How to Replace Head Printer Epson
How to Replace Head Printer Epson - Printer Head is one of the components of the printer which plays an important role. If one single problem, so 90% of your printing process will be hampered, For example, if the printer head blocked or damaged, of course, with kodisi so you will not be able to use the printer to the maximum, generally, the constraints on the printer head occurs for two reasons. That is because the nozzle clogged or broken.
Head printers are damaged due to clogged due to ink you use. While the broken nozzle itself caused over head or the head is hot, causing the ink that is issued irregularly or not come out at all.
If it has been damaged like that, you have to change your printer head, Here we are for the steps there can be use to replace the Epson Printer Head yours. This measure applies to all series of Epson printers.
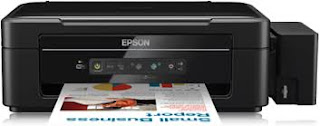
Please have a screw loose again available on the printer carriage. There is a screw cartridge cover that serves to protect the cartridge. On the front side of the cartridge there is a small hook. Take your screwdriver and gently pry up the entire cartridge available. Remove the hose attached to the carriage ink.
Remove the first casing your printer. Search screew your printer and release. Also loose screw that is on the front of the printer.
If the entire screew already detached, on the side of the printer will seem a hook. Please pry up using a screwdriver. Remove the hook also exist in the bottom of the printer and lift the printer casing of the holder. If you do manage to escape cassing, you are ready to enter the stage of replacing the head.
Before lifting the head, here you need to consider that on the right side and left the carriage, there is a small hook. The hook functions as the holder, so that the cartridge can be attached firmly. Please you off by pressing the hook is then slowly you lift it up. To facilitate the work, you should shift the carriage unit to the middle, how to press the carriage lock on the back. The color white is small, use a screwdriver to press the lock.
On the head, there are three (3) bolts that lock the head with a strong, off all three. Once all the bolts off, please unplug the head. Do it with caution
At this point you have managed to remove the printer head is not worth taking. Furthermore, please no post new printer head, which you have prepared in advance in accordance with the steps when you remove the head.
Thus the info How to Replace Head Printer Epson. Hopefully you can replace your defective printer head by applying measures that we have given.
Available link for download
Monday, December 5, 2016
How to Fix Printer Head
How to Fix Printer Head
How to Fix Corrupt Printer Head
 |
| How to Fix Printer Head |
Head printers are damaged due to clogged due to ink you use. While the broken nozzle itself caused over head or the head is hot, causing the ink that is issued irregularly or not come out at all.
If it has been damaged like that, you have to change your printer head, Here we are for the steps there can be use to replace the Epson Printer Head yours. This measure applies to all series of Epson printers.
how to fix a printer offline
Please have a screw loose again available on the printer carriage. There is a screw cartridge cover that serves to protect the cartridge. On the front side of the cartridge there is a small hook. Take your screwdriver and gently pry up the entire cartridge available. Remove the hose attached to the carriage ink.
see also abou how to clean a printhead Canon
Remove the first casing your printer. Search screew your printer and release. Also loose screw that is on the front of the printer.
If the entire screew already detached, on the side of the printer will seem a hook. Please pry up using a screwdriver. Remove the hook also exist in the bottom of the printer and lift the printer casing of the holder. If you do manage to escape cassing, you are ready to enter the stage of replacing the head.
how to fix a printhead
Before lifting the head, here you need to consider that on the right side and left the carriage, there is a small hook. The hook functions as the holder, so that the cartridge can be attached firmly. Please you off by pressing the hook is then slowly you lift it up. To facilitate the work, you should shift the carriage unit to the middle, how to press the carriage lock on the back. The color white is small, use a screwdriver to press the lock.
On the head, there are three (3) bolts that lock the head with a strong, off all three. Once all the bolts off, please unplug the head. Do it with caution
how to clean a printhead
At this point you have managed to remove the printer head is not worth taking. Furthermore, please no post new printer head, which you have prepared in advance in accordance with the steps when you remove the head.
see also abou how to clean a printhead hp
Thus the info How to Replace Head Printer Epson. Hopefully you can replace your defective printer head by applying measures that we have given.
see also abou how to clean a printhead Epson
Available link for download
Tuesday, October 18, 2016
How To Dribble Soccer Ball With Your Head Up
How To Dribble Soccer Ball With Your Head Up
Keeping your head up is one of the core tenets of dribbling in soccer, along with keeping the ball moving and near your feet. Dribbling a soccer ball is "a case of continually looking up and down," says Wes Harvey, former mens soccer team coach at Morgan State University in Baltimore, Maryland. You have to look down to see the ball and your feet. Then lift your head up to see where your teammates are in relation to the opponent for a possible pass or shot.
Step 1
Tap, poke or kick the ball. Look up as you run to where you need to be for the next dribble. Keep your head up as much as possible as you dribble, especially if you have good peripheral vision, Harvey advises. "The classic thing I say to players is that when you are hitting a baseball, you dont look away; similarly, you look at the ball when you make contact in soccer." After you push the ball forward, look up.
Step 2
Keep your glances down at the ball and your feet brief. "You dont have to stare at the ball," Harvey notes. "You do have to be aware of where it is." Stay conscious of the fact that maintaining excellent field vision is just as important as good control of the ball.
Step 3
Prepare to receive a pass by keeping your head up, especially if you are a forward. Conduct a quick check around you to see where everyone is and which way they are moving, so when the ball comes, you are prepared to dribble or pass -- or hold the ball while looking for a better option. "The problem is, if someone is moving and then cuts in a different direction, if you dont look up, you pass to where they were headed, not where they are headed," Harvey observes.
Step 4
Improve your ability to dribble the ball with your head up by practicing a drill such as Peter Pan Dribbling, described in "The Baffled Parents Guide to Great Soccer Drills." Have a partner hold a soccer ball and run in unpredictable patterns in the center circle of a soccer field. Dribble your own soccer ball to stay in his shadow, keeping your head up to track your partner. Add other pairs of teammates to the center circle, also shadowing each other, to add a higher degree of challenge.
Available link for download
Sunday, October 2, 2016
How to Unclog Clogged Epson CX5400 Print Head
How to Unclog Clogged Epson CX5400 Print Head
Epsons CX5400 is a multifunction printer, meaning it not only prints, but also makes copies and scans documents. If you notice gaps in the images or text on printouts made by the CX5400, it is a sign of a clogged print head. Epson has outfitted the CX5400 with a print head cleaning process that can be performed with just the printer controls. The cleaning process does use some ink to clean the print head, so use the cleaning process only when necessary.
Follow the instruction to unclog clogged Epson CX5400 Cartridge
Follow the instruction to unclog clogged Epson CX5400 Cartridge
- Turn on the CX5400 and let the printer finish its warmup process.
- Press the left "Menu" button on the printer repeatedly until "Head Cleaning" appears on the printers display screen.
- Press the "Color Copy" button. The CX5400s cleaning process will begin and will last for about 30 seconds. The "On" light on the printer will flash until the cleaning is complete.
- Load the paper tray, if it does not already have paper, and press the left "Menu" button on the printer until "Nozzle Check" appears on the printers display screen. Press the "Color Copy" button on the printers control panel and wait as a test page prints. Examine the pattern printed on the test page for any gaps. If gaps appear in the printout, run the cleaning process again.
Available link for download
Subscribe to:
Posts (Atom)